How to deploy your react application with Vercel super fast 🚀🚀

Today there are many hosting platforms that can host your website and provide you all flexibility without paying any penny. You can host your portfolio, personal projects, and some other cool stuff.
What is so special about Vercel and why did I choose Vercel to host the react application?

Vercel is a popular static web hosting serverless platform for front-end developers. The platform allows developers to host websites and web services, by providing speed and reliability it can deploy instantly, and scale automatically with minimal configuration just need to create it at the moment of inspiration.
You can use serverless functions to handle user authentication, form submission, database queries, custom Slack commands, and many more. Vercel integrates well with popular tools, such as GitHub, GitLab, etc.
Features of Vercel
- Build and Deploy your Project with automatic CI/CD
- Automatic Git Integration
- Vercel Analytics
- Incremental Static Regeneration
- Provide State level production
Now you are familiar with Vercel and ready to host your application

I will be assuming you had one react project and looking for the hosting part so let's get started.
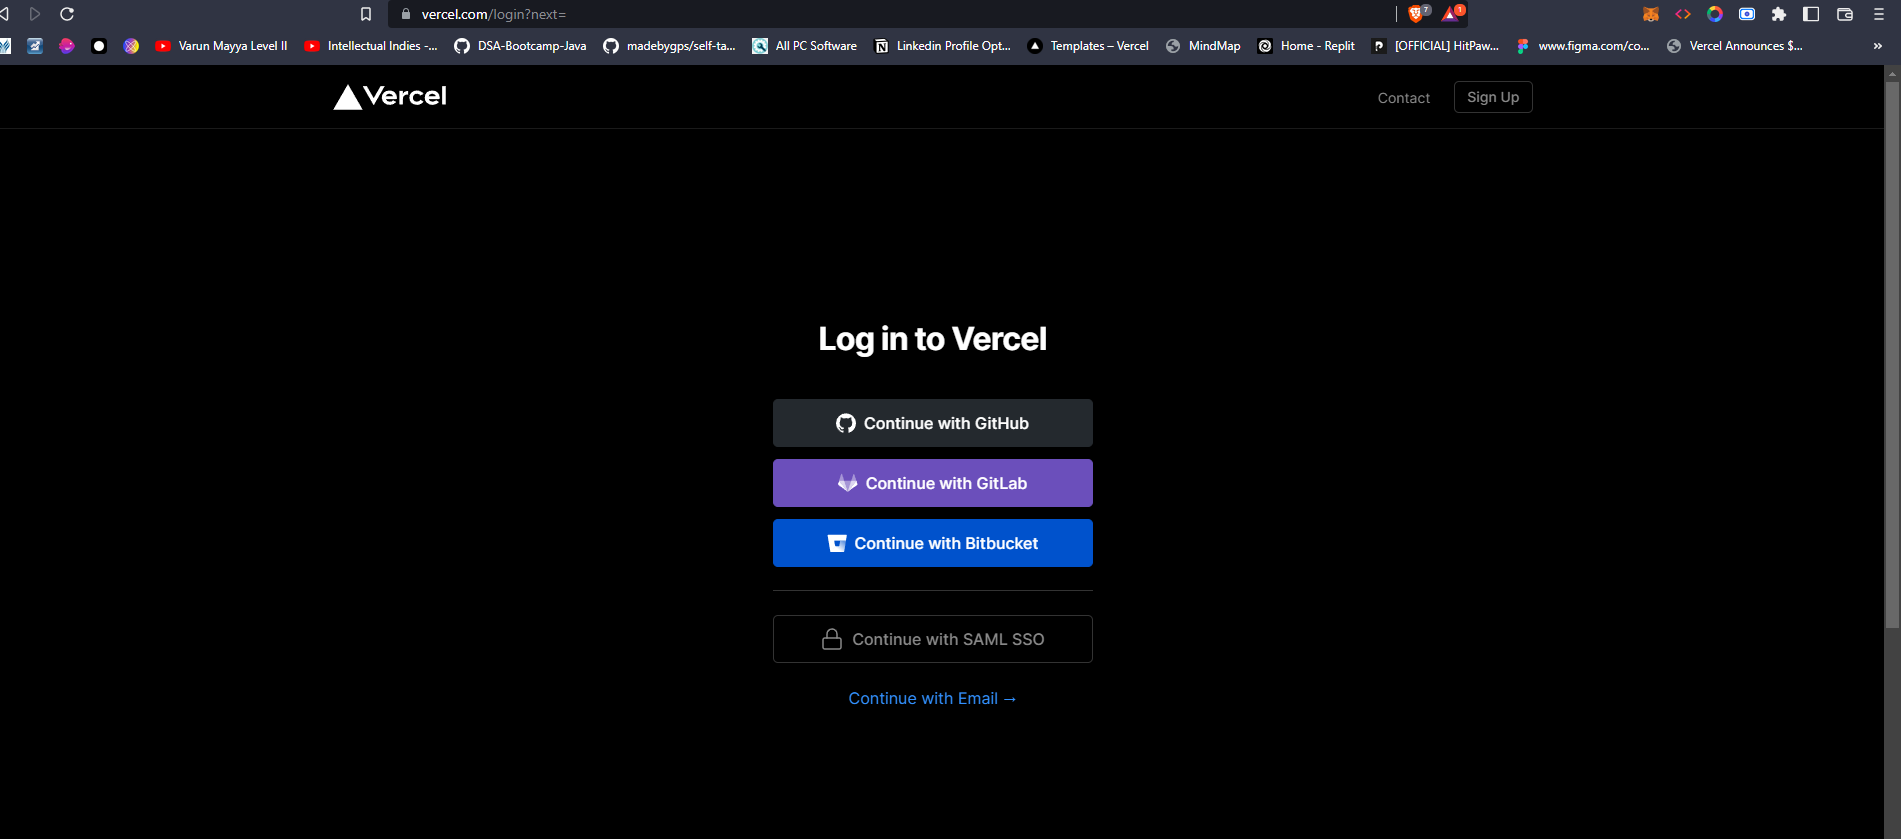
Make an account in Vercel continue with Github
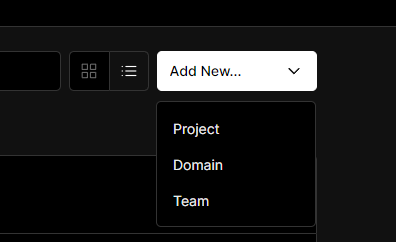
You will redirected to a dashboard section then click on the Add New menu, and select Project

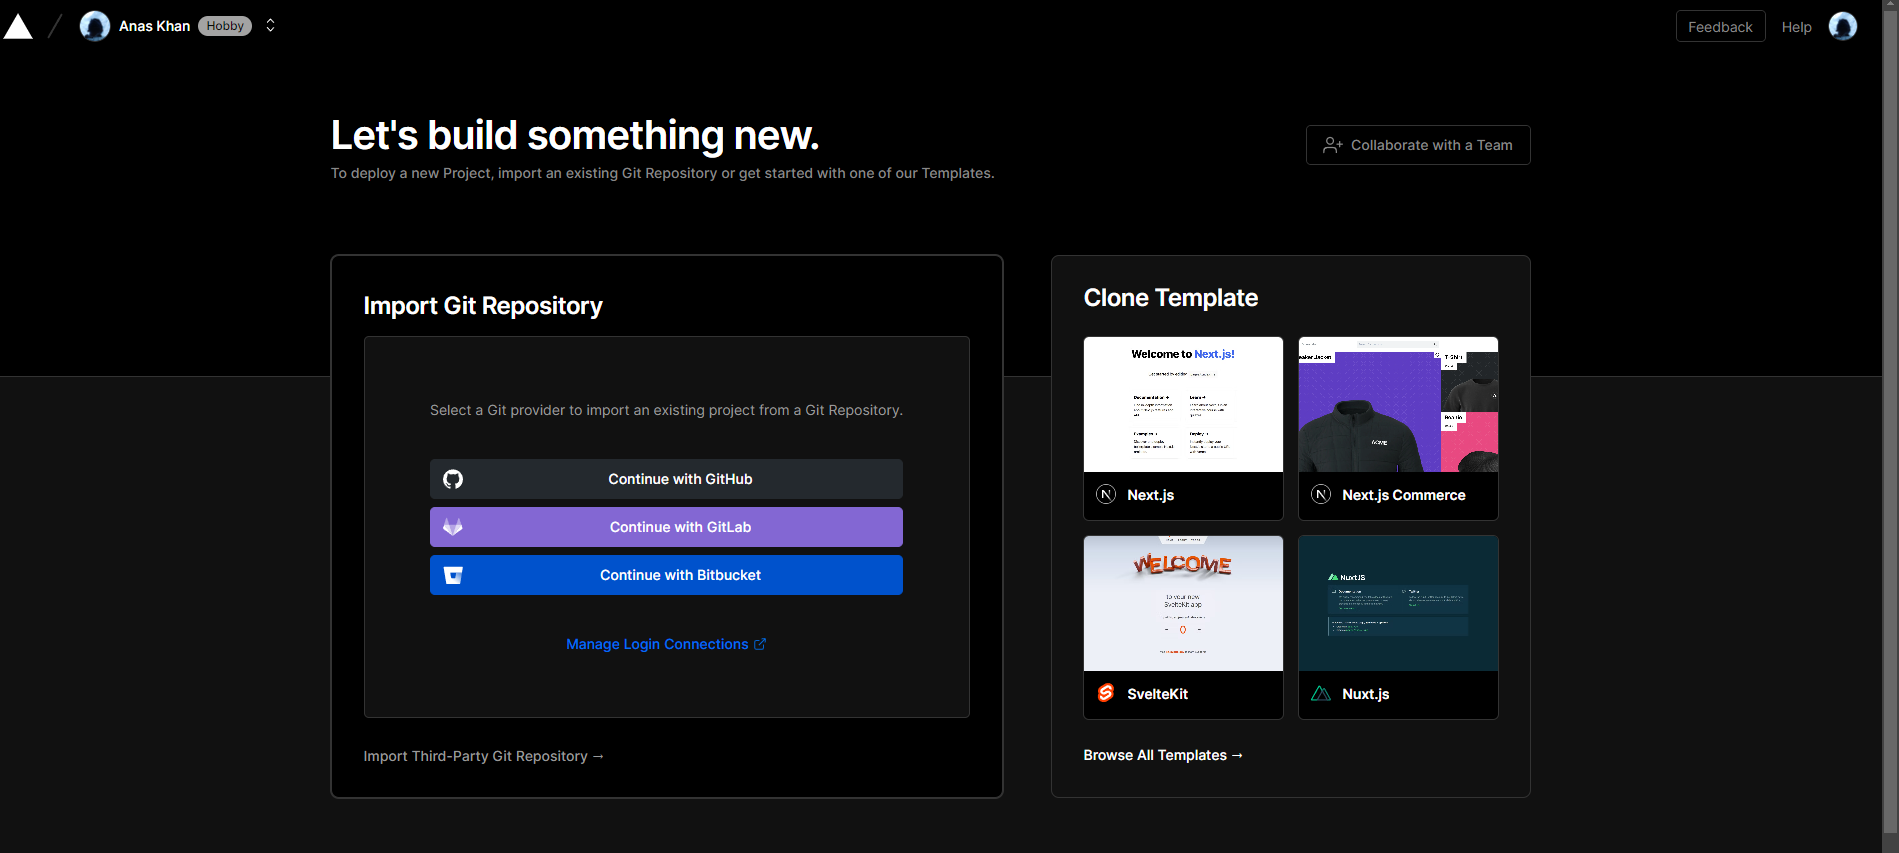
Click Continue with Github
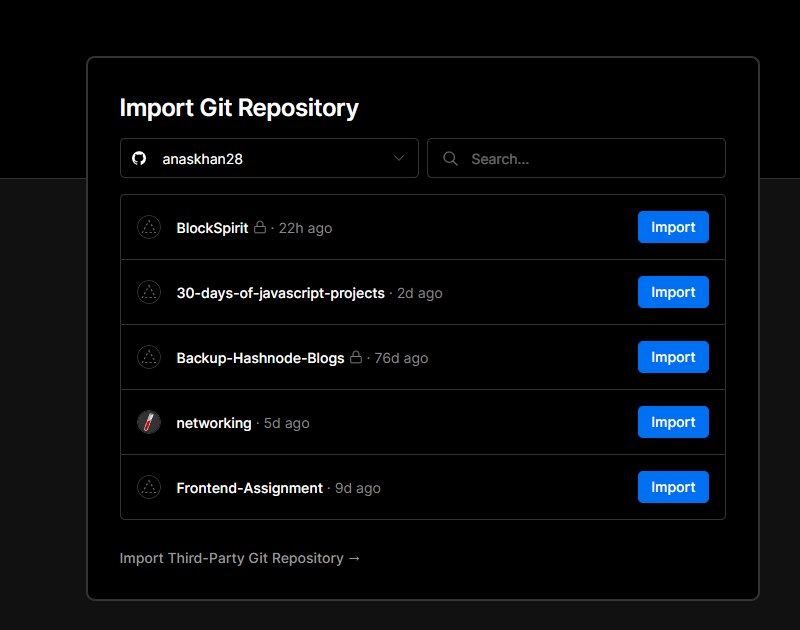
Select the repository you want to host
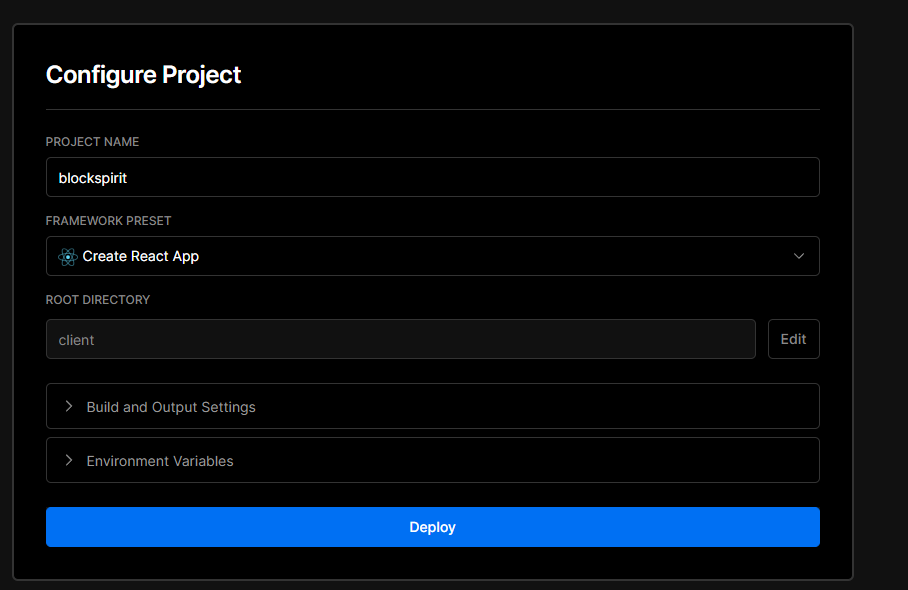
Write the Name of the project (only lowercase) and select Create React App in the Framework Preset section.

Click on the Edit root directory and choose the folder where the react application is stored. In my case, it is in the client folder and then click Continue
Do this step only if you have multiple folders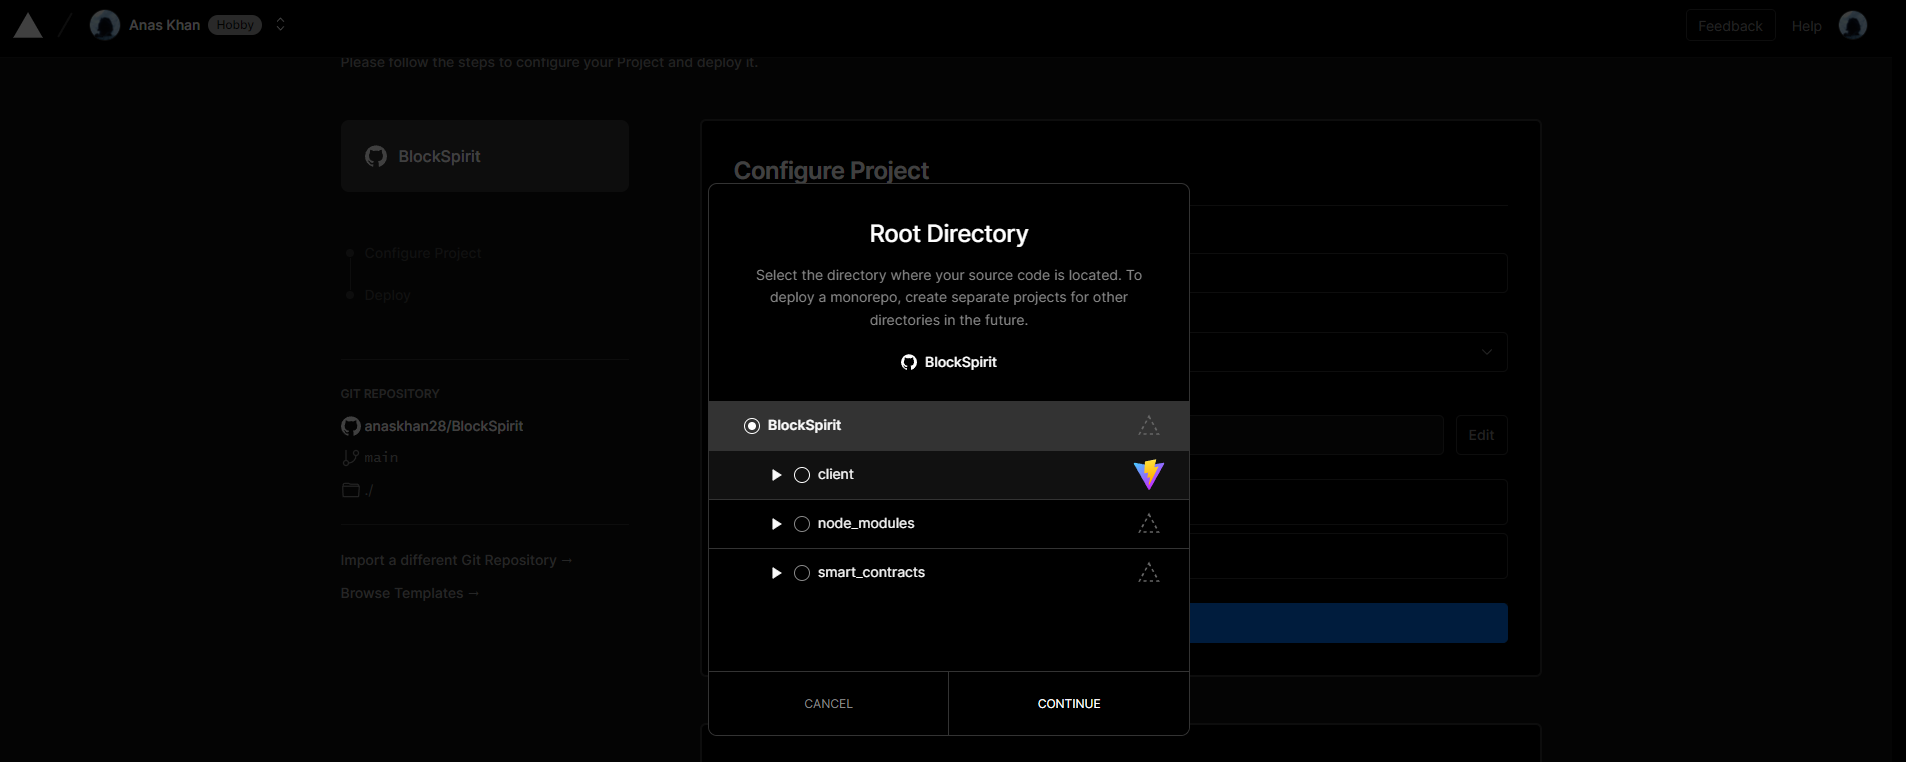
Click on Deploy and wait for an application to get deployed.
Congratulation your site has been deployed 🎉
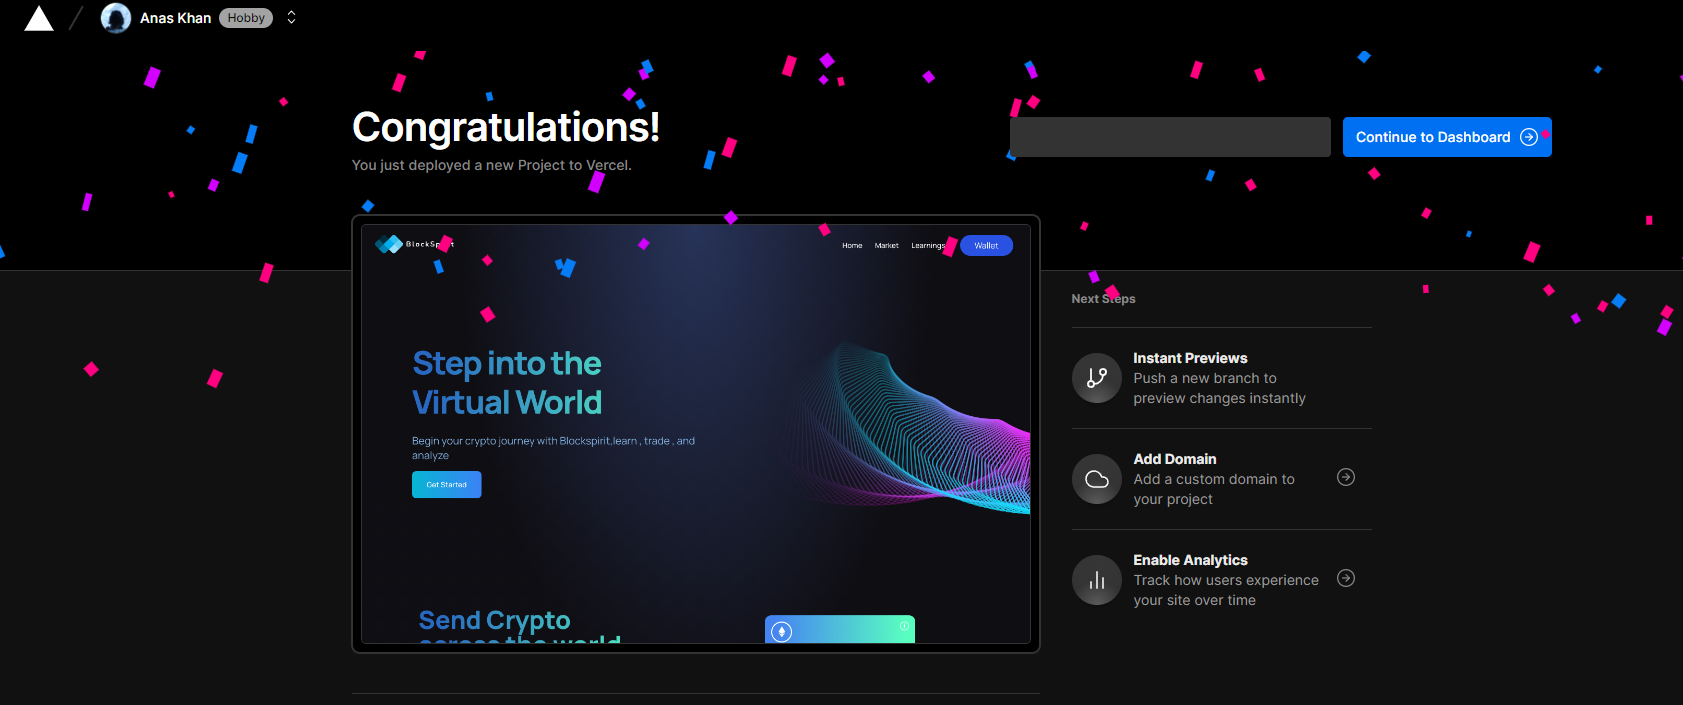
Click on Continue to Dashboard and click on the Visit tab.
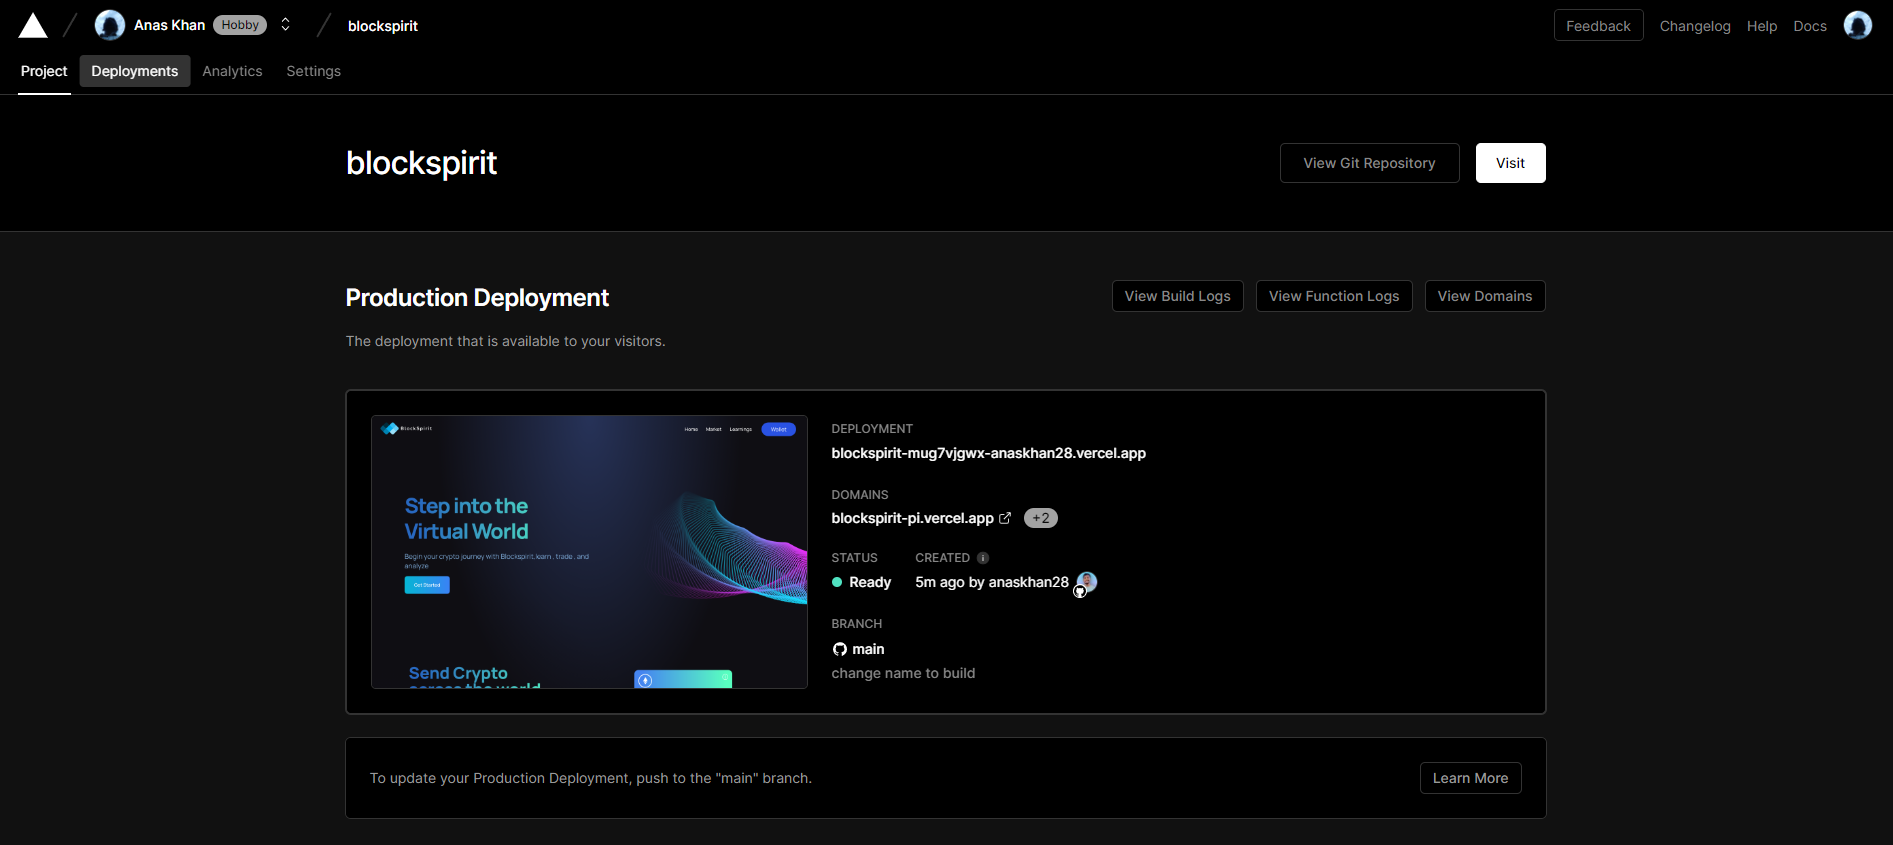
Our website is ready and now anyone with this link can visit your website.
Thanks for reading.❤️
Let me know which hosting platform do you use and why?

Until the next time 👋